CDi player Timekeeper IC repair
CDi player Timekeeper repair.
 Inside a CDi player is a special IC where games can store data. This data is stored even when the CDi player is switched off. The data is normally the high-score list of the game.
After a number of years the high-scores are not stored anymore. The Timekeeper IC does not function anymore. A simple solution is to replace the IC in the CDi player. But what is wrong with the Timekeeper IC? The IC is a RAM memory with it's own battery. This battery keeps the data inside the RAM available. Sadly after a number of years the battery will be empty.
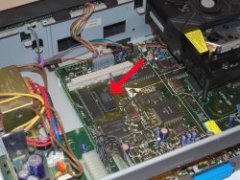
On the picture you can see the inside of the CDi player. This is a Philips CDi-210 player. The red arrow points to the Timekeeper IC (M48T08 150). Click on the picture for a bigger version.
Opening the Timekeeper IC.
 Opening the Timekeeper IC is not as easy to do as it's sounds. The battery is sealed inside the upper-part of the IC.
With a small saw I removed the front (upper) part of the IC. After that I took a sharp knife and slowly removed the sealing compound out of the IC. Be careful with this, because you do not want to damage the connections from the battery to the RAM memory. Also do not damage the lower-part of the IC where the RAM memory is.
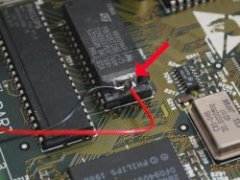
On the picture you can see a small part of the battery. Remove the sealing compound until the two connections from the battery to the RAM memory are available.
Check with a Voltage-meter where the positive and the negative connections are on the battery. Solder a wire to each of the connections from the battery to the RAM memory. I used a red wire for the positive and a black wire for the negative, but you can use other colors. Keep the wires long enough so that you can place the "new" battery on a easily accessible place.
After you have soldered the wires, you need to disconnect 1 side of the old battery. The red arrow is pointing to the point where I cut through the connection with a sharp knife.
Now it's time to clean the inside of the CDi player. Make sure that all the dirt from opening the IC is removed from the CDi player.
For extra strength you can add some (hot-) glue to soldered wires.
Installing the new battery.
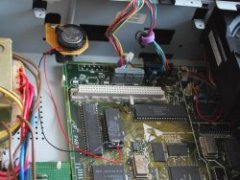
 For the new battery I used a old battery holder from a PC. The battery is a CR-2032 (3 Volt) type. The battery holder is placed upon a piece of experimental pcb. This pcb is mounted on a small metal tab that was not used.
The wires from the Timekeeper IC are connected to the battery holder.
The battery can be replaced easily, but that not necessary for another 10 years.
Put your CDi player together again.
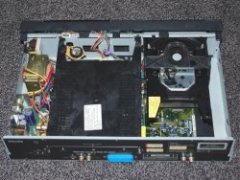
 After everything is installed you can close the CDi player. On the picture you can see that the Digital Video Cartridge is installed.
Testing if it works. Start the CDi player and play a game. Save your high-score. Switch the CDi player off for a while and switch it on again. If the high-score is still available you have successfully repaired your Timekeeper IC.
This article is based on a article from Interactive Dreams.
Update: 2011-06-24 20:19:43